PBW Stories
Paperback Writer's Fiction BlogSaturday, February 14, 2009
Basic Patchwork Quilt Repair
Repairing a quilt mainly requires time and patience. Before you attempt to repair any vintage quilt, it's a good idea to have it appraised and (if possible) obtain an estimate on having it restored by a professional, certified quilt conservator. Because most vintage quilts are in fragile condition, and are unique pieces of history that cannot be replaced, you may do more harm than good by trying to repair it yourself.
Still, if you own a relatively newer quilt that needs some TLC, or you buy an old or cutter quilt that isn't valuable but that you'd like to repair, you can perform basic repairs yourself. First, be sure the quilt is basically strong enough for regular use or display, because there's no sense in repairing a quilt you can't use.
You'll also need to figure out how much work is going to be involved. Estimate the amount of damage you have to repair by looking at the surface of the piece. I never work a quilt that is more than 50% damaged because it's too time-consuming; I can make three or four brand-new quilts in the same amount of time it takes to repair a seriously damaged piece.
Here's a section of an antique quilt I'm working on this week. It's approximately twenty to thirty years old, probably one of the early imports that were sold in department stores when the quilt craze started taking off:
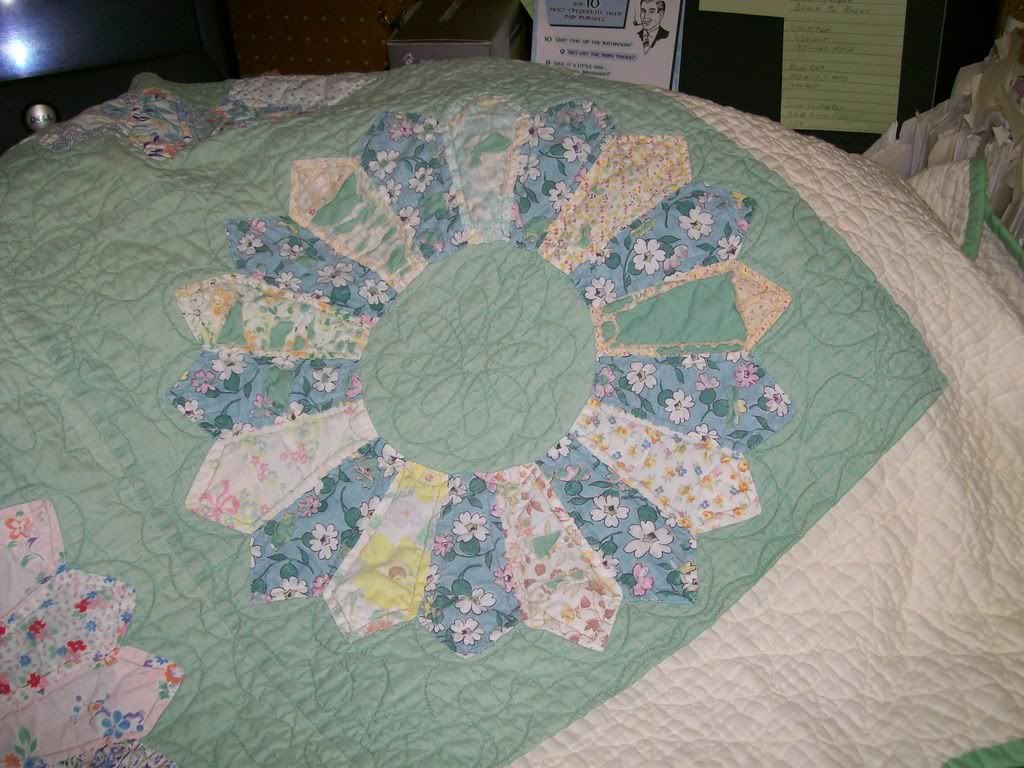
I don't care for imported quilts, which are made in sweat shops overseas by women who are only paid pennies for their work, but since they have little to no value they're excellent to use as teaching and demonstration pieces. I also like reclaiming imported quilts and transforming them because that's my little way of flipping off the department stores (this project will be part of a booklet I'm writing for my guild.)
The foundation of this quilt is intact and strong, the machine quilting is also in great shape, and the feel of it is nice and soft. Most of the dresden plates (the circles of patchwork) are worn and/or torn. To repair it, I'll have to replace each patch one at a time.
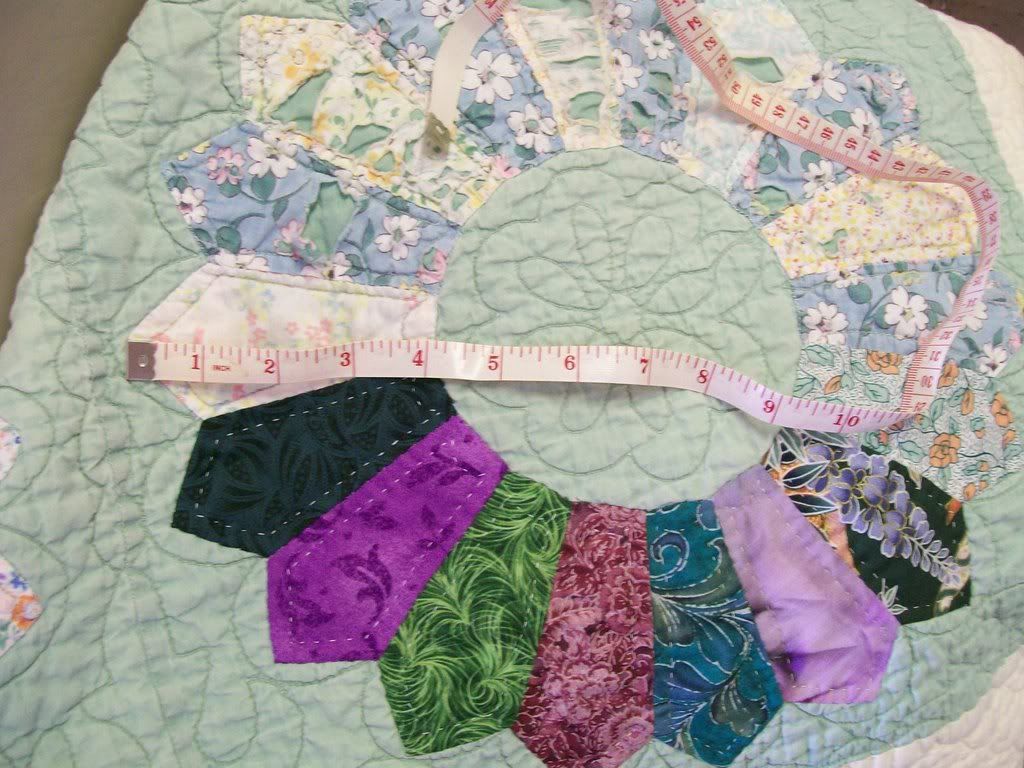
Each conservator has a slightly different approach to repair work. I custom-fit my replacement patches to the individual area because over time quilts stretch and what may have started out as a piece with identical-sized patches will have variations in patch size.
To custom-fit patchwork, the first step is to measure the dimensions of the patch you want to replace:
Use a piece of your scrap/leftover fabric or cut a patch from new fabric that is at least 1/2" wider and longer than the patch you're replacing:
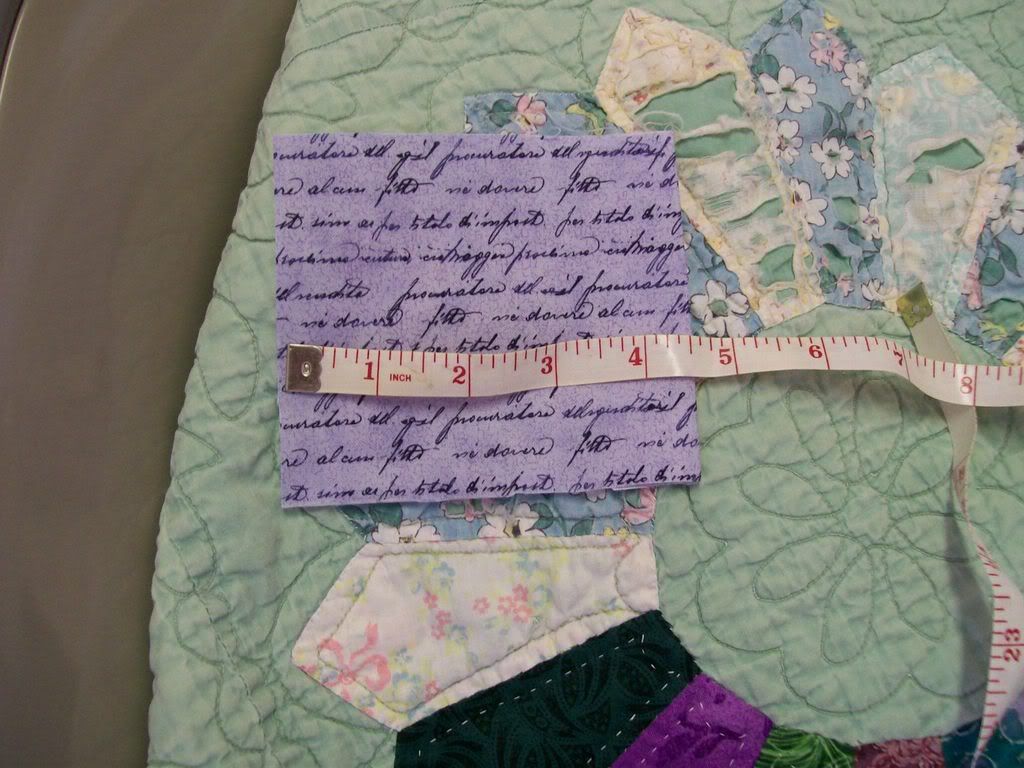
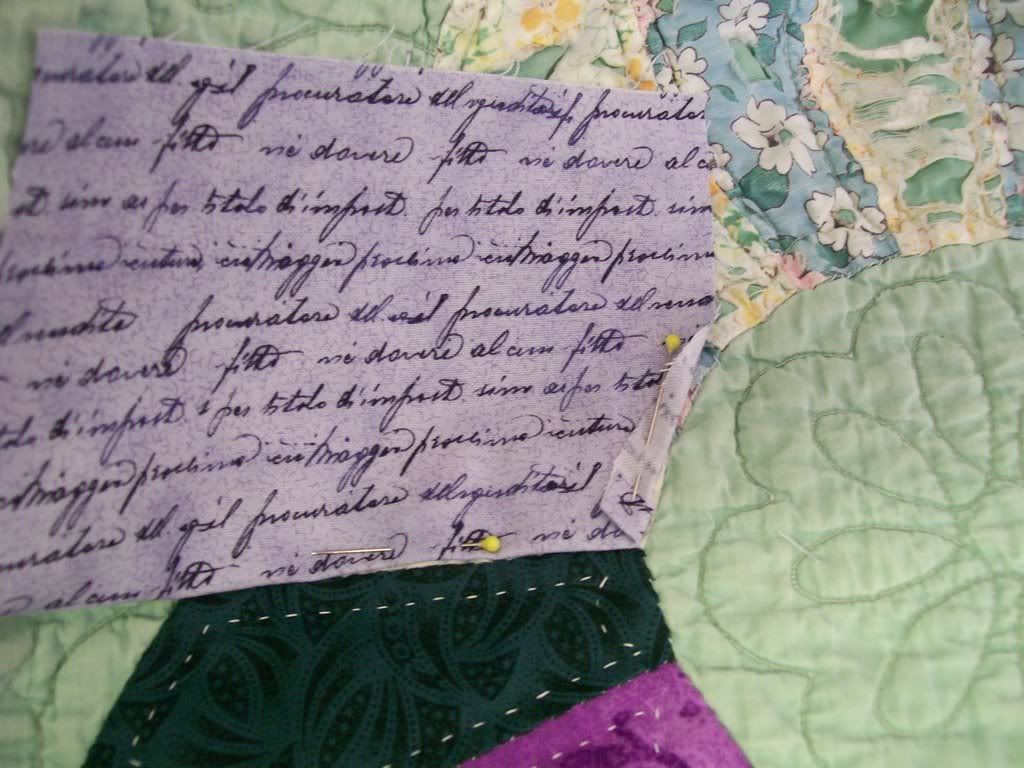
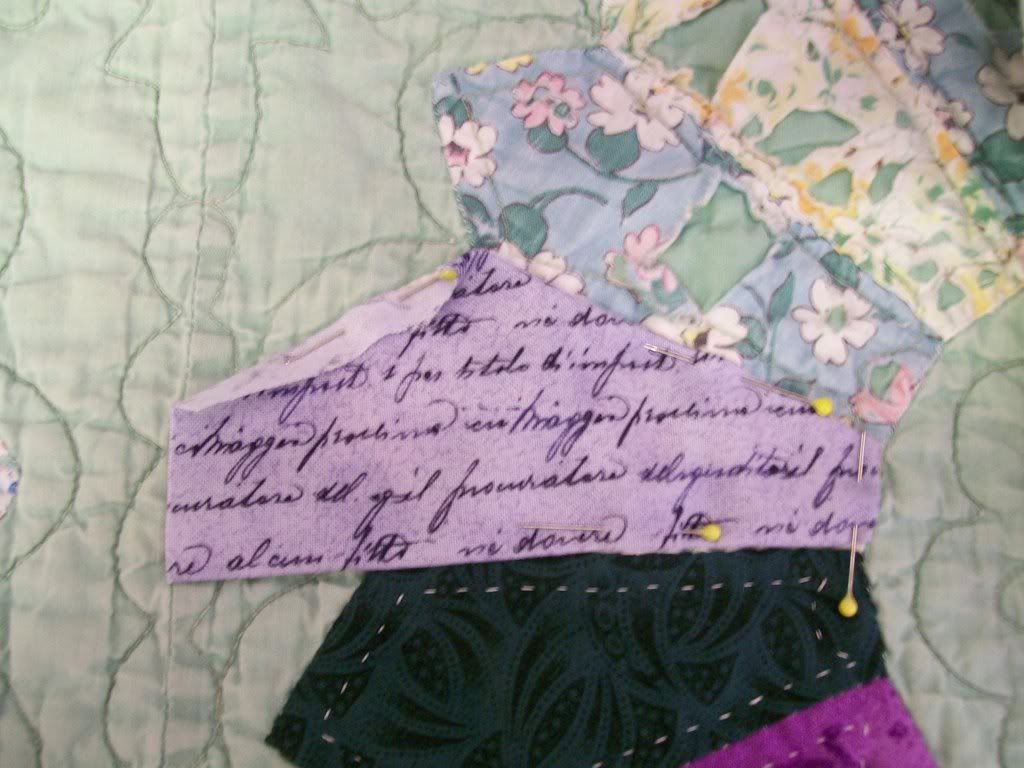
Fold under 1/4" of one side of the patch (I generally start at the longest/bottom-most seam) and pin it in place directly over the old patchwork:

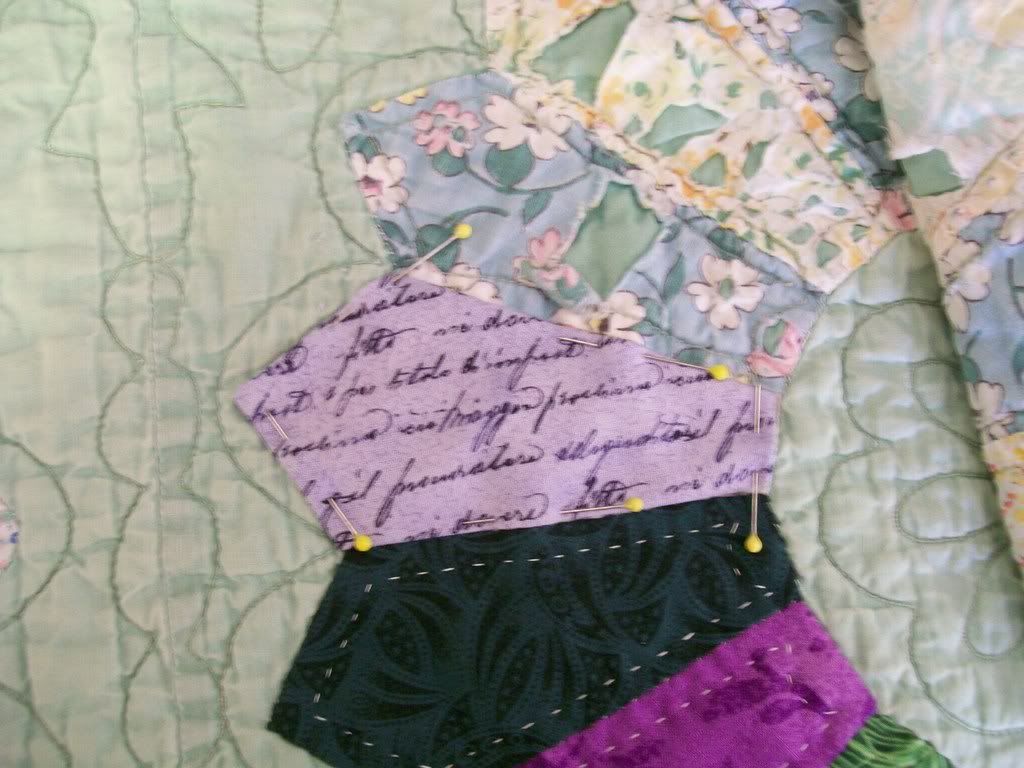
Now working in a counter-clockwise direction, move to the next seam and fold your new patch backward until the edge matches the corresponding seam of the old patch. Trim to 1/4", then fold under the extra fabric and pin in place:
Repeat this step with the next side of the patch:

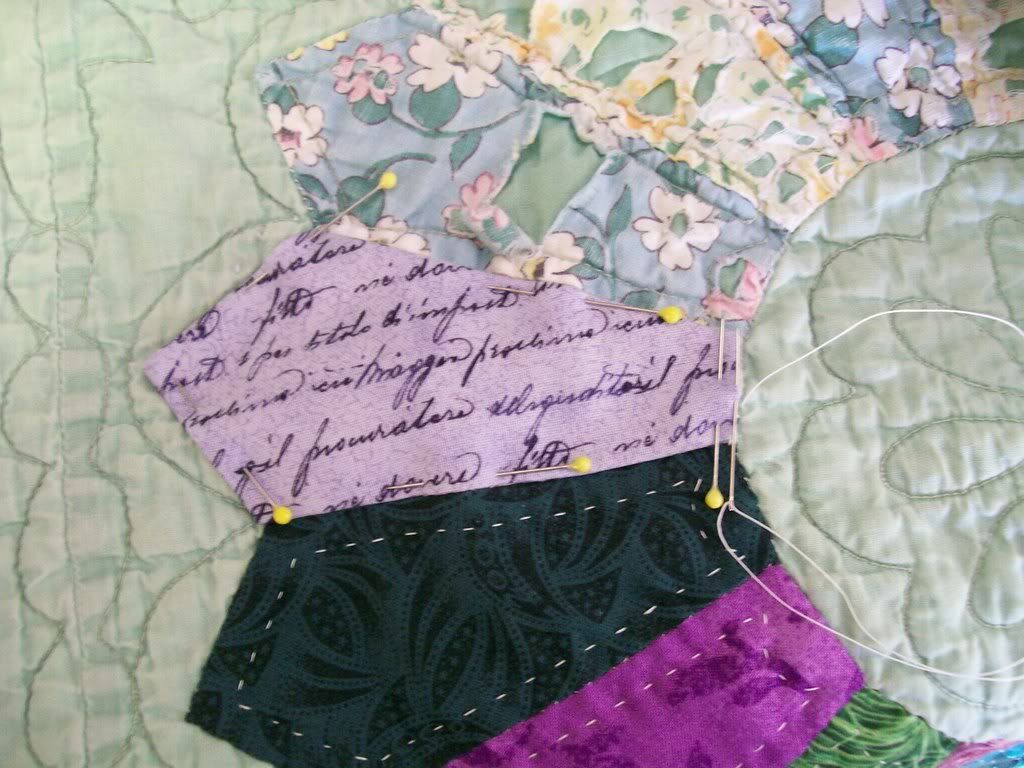
Remember to trim only to 1/4" of the seam, to give you enough fabric to fold under and pin:

Continue in a counter-clockwise direction, repeating the same steps:
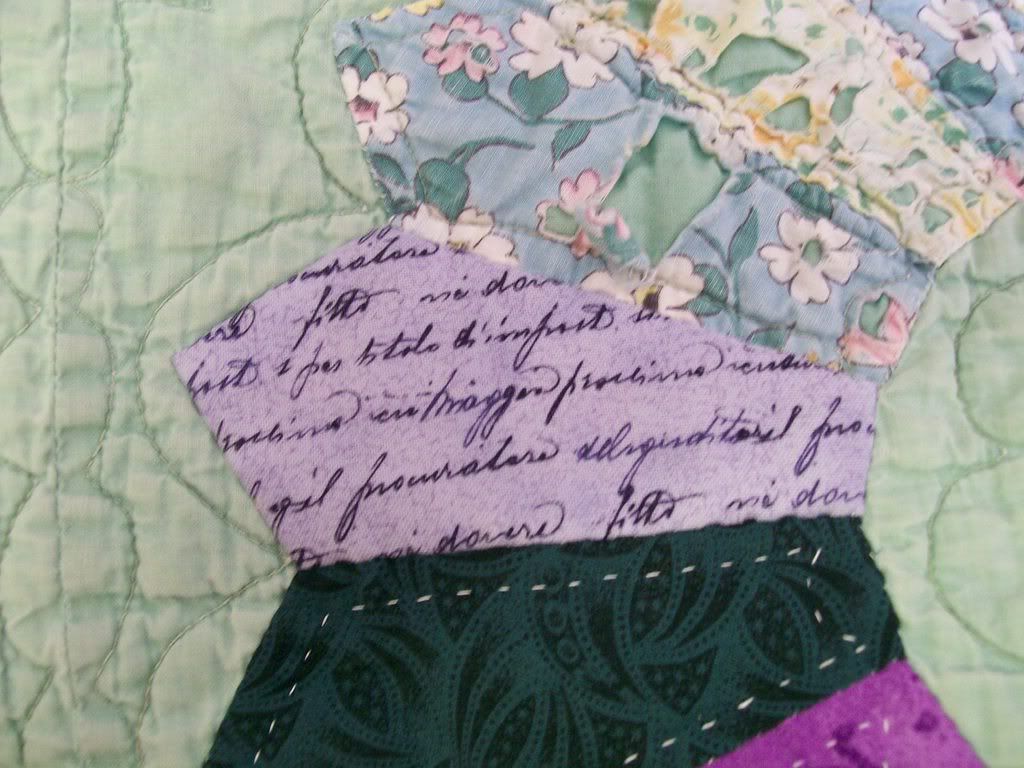
When you have fitted your new patch to the quilt, it should look like this:
Starting at the innermost seam, begin blind-stitching or applique-stitching your new patch to the old (I use a blind stitch because I think it looks neater.) Your new seams should just cover the old ones beneath it:
Continue stitching the patch to the surface of quilt in a counter-clockwise direction until all of the seams are sewn over the old patch:
Once you've stitched the replacement patch in place, you can quilt it to the quilt. Your stitched will likely be larger than usual because you have to get the needle through an extra layer of material:
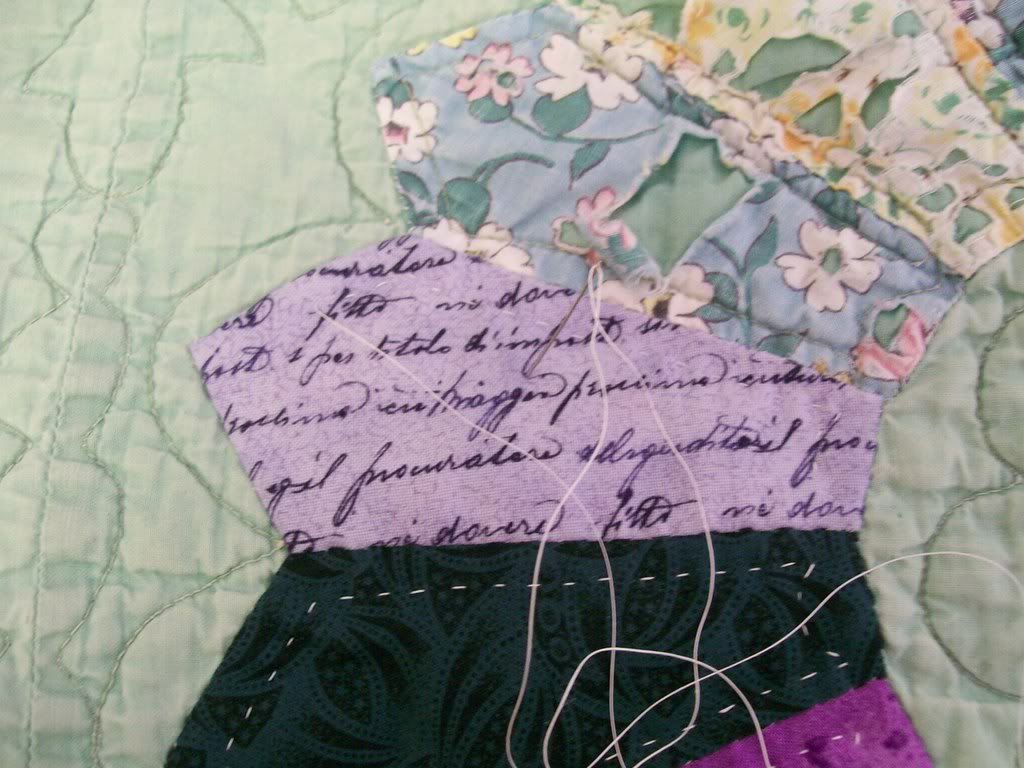
The finished patch should look like this:

Here's the progress I've made so far on this section:

This technique not only repairs the damage, it preserves the original patchwork beneath the replacement fabric. This adds strength to the quilt but more importantly it preserves the original work. While imports may never have any value, I don't like destroying someone else's work -- and who knows, maybe in thirty more years old import quilts will skyrocket in value.
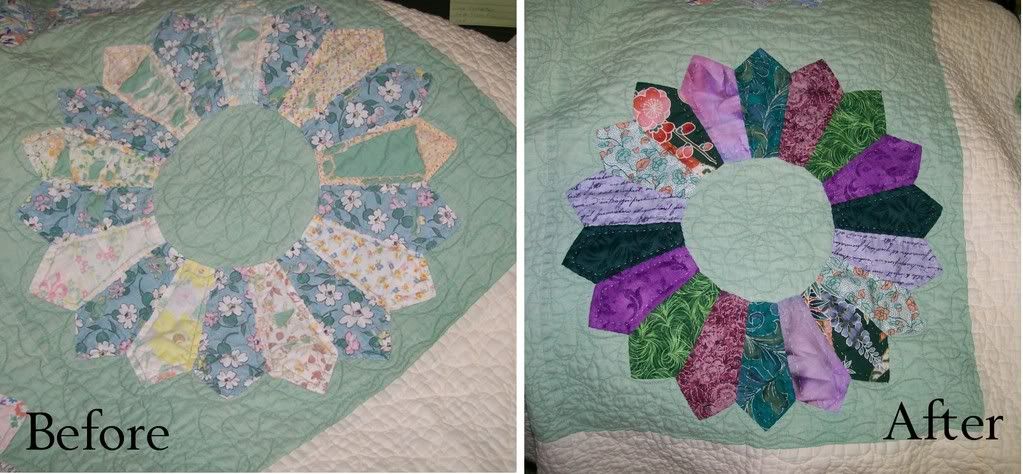
Another note on this particular project: Usually I would use fabrics that match the surface patchwork, but because this contains cheap, uninteresting materials without much variety in the patterns I decided it wasn't worth going through the effort of fabric matching. Making it over with these stronger, more dramatic colors and patterns will give it more contrast and visual impact, and will draw the eye away from some of the sunlight damage to the background fabric.
The work to properly repair a quilt is painstaking and can get boring, so I recommend anyone who hasn't ever tried it to start with something small. Practice first on a cutter quilt piece (a manageable section cut out of an old quilt; you can buy them on eBay) or a crib-size baby quilt.
Also, don't attempt to make your first repair job a quilt with small or difficult-looking patchwork pattern; go for simple quilts that have block- or rectangular patchwork (triangle-shaped patches are hard to fold and fit; circular or curved patchwork requires a different type of fitting technique for replacement patches.)
Added 2/17/09: Here's a before and after on the finished section:
Repairing a quilt mainly requires time and patience. Before you attempt to repair any vintage quilt, it's a good idea to have it appraised and (if possible) obtain an estimate on having it restored by a professional, certified quilt conservator. Because most vintage quilts are in fragile condition, and are unique pieces of history that cannot be replaced, you may do more harm than good by trying to repair it yourself.
Still, if you own a relatively newer quilt that needs some TLC, or you buy an old or cutter quilt that isn't valuable but that you'd like to repair, you can perform basic repairs yourself. First, be sure the quilt is basically strong enough for regular use or display, because there's no sense in repairing a quilt you can't use.
You'll also need to figure out how much work is going to be involved. Estimate the amount of damage you have to repair by looking at the surface of the piece. I never work a quilt that is more than 50% damaged because it's too time-consuming; I can make three or four brand-new quilts in the same amount of time it takes to repair a seriously damaged piece.
Here's a section of an antique quilt I'm working on this week. It's approximately twenty to thirty years old, probably one of the early imports that were sold in department stores when the quilt craze started taking off:
I don't care for imported quilts, which are made in sweat shops overseas by women who are only paid pennies for their work, but since they have little to no value they're excellent to use as teaching and demonstration pieces. I also like reclaiming imported quilts and transforming them because that's my little way of flipping off the department stores (this project will be part of a booklet I'm writing for my guild.)
The foundation of this quilt is intact and strong, the machine quilting is also in great shape, and the feel of it is nice and soft. Most of the dresden plates (the circles of patchwork) are worn and/or torn. To repair it, I'll have to replace each patch one at a time.
Each conservator has a slightly different approach to repair work. I custom-fit my replacement patches to the individual area because over time quilts stretch and what may have started out as a piece with identical-sized patches will have variations in patch size.
To custom-fit patchwork, the first step is to measure the dimensions of the patch you want to replace:
Use a piece of your scrap/leftover fabric or cut a patch from new fabric that is at least 1/2" wider and longer than the patch you're replacing:
Fold under 1/4" of one side of the patch (I generally start at the longest/bottom-most seam) and pin it in place directly over the old patchwork:
Now working in a counter-clockwise direction, move to the next seam and fold your new patch backward until the edge matches the corresponding seam of the old patch. Trim to 1/4", then fold under the extra fabric and pin in place:
Repeat this step with the next side of the patch:
Remember to trim only to 1/4" of the seam, to give you enough fabric to fold under and pin:
Continue in a counter-clockwise direction, repeating the same steps:
When you have fitted your new patch to the quilt, it should look like this:
Starting at the innermost seam, begin blind-stitching or applique-stitching your new patch to the old (I use a blind stitch because I think it looks neater.) Your new seams should just cover the old ones beneath it:
Continue stitching the patch to the surface of quilt in a counter-clockwise direction until all of the seams are sewn over the old patch:
Once you've stitched the replacement patch in place, you can quilt it to the quilt. Your stitched will likely be larger than usual because you have to get the needle through an extra layer of material:
The finished patch should look like this:
Here's the progress I've made so far on this section:
This technique not only repairs the damage, it preserves the original patchwork beneath the replacement fabric. This adds strength to the quilt but more importantly it preserves the original work. While imports may never have any value, I don't like destroying someone else's work -- and who knows, maybe in thirty more years old import quilts will skyrocket in value.
Another note on this particular project: Usually I would use fabrics that match the surface patchwork, but because this contains cheap, uninteresting materials without much variety in the patterns I decided it wasn't worth going through the effort of fabric matching. Making it over with these stronger, more dramatic colors and patterns will give it more contrast and visual impact, and will draw the eye away from some of the sunlight damage to the background fabric.
The work to properly repair a quilt is painstaking and can get boring, so I recommend anyone who hasn't ever tried it to start with something small. Practice first on a cutter quilt piece (a manageable section cut out of an old quilt; you can buy them on eBay) or a crib-size baby quilt.
Also, don't attempt to make your first repair job a quilt with small or difficult-looking patchwork pattern; go for simple quilts that have block- or rectangular patchwork (triangle-shaped patches are hard to fold and fit; circular or curved patchwork requires a different type of fitting technique for replacement patches.)
Added 2/17/09: Here's a before and after on the finished section:
Labels: quilting
posted by the author # 6:07 PM 
Archives
May 2006 July 2006 September 2006 October 2006 March 2007 June 2007 August 2007 November 2007 December 2007 March 2008 May 2008 October 2008 November 2008 February 2009 April 2009 June 2009 October 2009 November 2009 January 2010 February 2010 October 2010 November 2010 March 2011 June 2011 August 2012 November 2012 November 2014
![]()